
9# - Combining files with Power Query
a few suggestions from my experience

Reading time: 9 minutes
Hi there,
Here is Francesco Marino from “Better at Data”.
Today we have a more technical article than usual.
Here are a few best practices I use when I consolidate files in Power Query (both in Power BI and Excel). I tried to explain all step by step, but here you can see the files with the code and the final result: 9 - Combine files in Power Query - A few suggestions.
First, do you know you can use Power Query in Excel? This means you can automate a lot of data cleaning/consolidation activities directly in Excel without any additional tools. If you did not know it, now you know it 🙂
Today we will see specifically how I would combine three .xlsx files with the similar structure into one with Power Query.
Let’s start!
Initial status
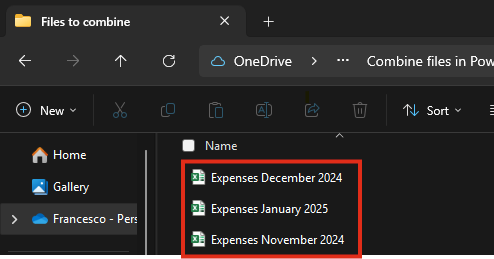
We want to consolidate 3 files with a list of expenses of three months. These files are in the same folder. This is how the folder looks like.
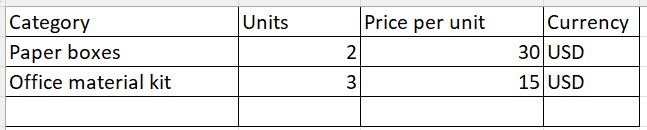
Here is how each of the files looks like. The 3 files in the best case should have the same structure: same sheet, same columns. In this case, the structure will be slightly different so we can see real-word technical problems.


We want to consolidate these files into a new .xlsx file called “Combined Expenses”.
Combining the files
The first step is to combine the three monthly expenses files with Power Query. I will not explain this step in detail since I want to focus only on the best practices. You can find how to combine files in Power Query here: https://learn.microsoft.com/en-us/power-query/combine-files-overview.
The results of the file combination in Power Query are these 5 entries in the Queries pane:
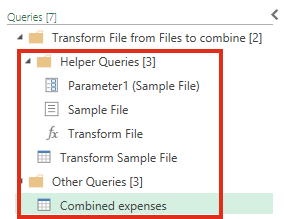
Let’s see the entries:
4 entries under a new “Helper Queries” folder in the query pane:
Transform Sample File: as described here, it “creates an example query that performs all the required extraction steps for a single file.”
This query contains all the data transformation steps that will be applied to each of the file to consolidate. You can modify this query if you want to do data transformations to each of the files before the consolidation happens.
Parameter 1: this is needed for technical reasons. There is not much to add.
Sample File: the file used by Power Query to understand what is the initial structure of each of the files to consolidate.
This is important. Missing columns in the Sample File will be missing in the consolidated data. Conversely, adding desired columns to the Sample File will include them in the consolidated data, even if they're not in all original files.
Transform File:
This function repeats the data transformations you set up in the 'Transform Sample File' query, across all the files you combine. For example, if you change 'null' to 'N/A' in the 'Category' column of your “Transform Sample File”, that change will apply to all combined files.
One entry under the “Other Queries” folder in the query pane:
In this case is called “Combined Expenses”, but it normally takes the name of the folder of the files you want to combine. This is the query where all the data from the different files will be combined.
Combined Expenses - Sheet “Combined Expenses”

To simplify:
the Sample File is how you foresee that the input files will look like.
The Transform Sample File is the result of the data transformation steps you want to apply to each file before the consolidation.
The Transform file is the function that will apply these steps to each file during the consolidation.
The “Combined Expenses” is the query that consolidates the results of the Transform file function for each file into one big single table.
Good! We have now consolidated all the files. Let’s make some small changes to improve this file consolidation.
Some suggestions
1 - Create and use a file template
Power Query, by default, takes as “Sample file” the first file in the folder. My suggestion is to create a customized file template and use it as the “Sample file” created for this specific purpose.
“Sample file” is the file that is used by Power Query to understand what is the initial structure of each of the files that will be consolidated.
Two main reasons that make me use this approach are:
different files you want to consolidate might have different column names or structures but you might want to have all the columns from all the files in the consolidated query, the ones that in this case we called “Combined Expenses”.
For example, I want to consolidate these 3 files with their below listed columns:
Expenses November 2024:
Category | Units | Price per unit | CurrencyExpenses December 2024:
Category | Units | Price per unit in USDExpenses January 2025:
Category | Units | Price per unit | Currency
To make sure that the “Combined Expenses” query contains all the columns from all the files, I need to make sure that the “Sample File” contains the following columns:
Sample File
Category | Units | Price per unit | Currency | Price per unit in USDOnce I get all the columns in the consolidated file I can add the required transformation steps so that I can get the final structure like this one:
Combined Expenses
Category | Units | Price per unit | CurrencyThe second reason is that sometimes you need to replace all the files to consolidate with new files. Just imagine a quarterly process in which every 3 months I replace Quarter-2 files with Quarter-1 files.
In this case, having a customised template file is useful to avoid the pipeline breaking because the default “Sample File”, the first in the folder, was removed.
2 - Use parameters for the file folder path and the file name
By default, Power BI uses as the source of the “Sample File” query a code similar to this.
= Source{[
#"Folder Path"="C:\Users\franc\OneDrive\Better at Data\Combine files in Power Query\Files to combine\",
Name="DO NOT MOVE THIS FILE - Consolidation template.xlsx"]}
[Content]
My suggestion is to parametrise the folder name and the file name. This means modifying the code so that the Folder Path and the File Name are passed as Power Query Parameters.
The final result will look like this:
= Source{[
#"Folder Path"=#"Template Folder Path",
Name= #"Sample File Name"]}
[Content]
Where “Template Folder Path” and “Sample File Name" are Power Query parameters defined in this way:
Template Folder Path = “C:\Users\franc\OneDrive\Better at Data\Combine files in Power Query\Files to combine\”
Sample File Name = “DO NOT MOVE THIS FILE - Consolidation template.xlsx”
The main reason to do this is to get the flexibility to modify folder path and file without modifying the Power Query code manually. This flexibility might be useful in a few cases:
You want to combine files from a different folder without changing the code.
You want another user with no Power Query skills to re-use the file combination logic without scaring him/her with code.
You want to modify the Template file with a different one, without changing the code.
In all these cases, just changing a Power Query parameter is easier than changing code of the query itself.
3 - Get information about which files are not combined and why
Sometimes 1+ files you want to combine couldn’t get combined because of errors in the consolidation process. The most common error happens when the sheet name of the Excel file you want to load is not the same as the one of the “Sample File”.
In this case, you might want to ignore these errors to load the rest of the files in the “Combined Expenses” query but you also want to check which files were not combined.
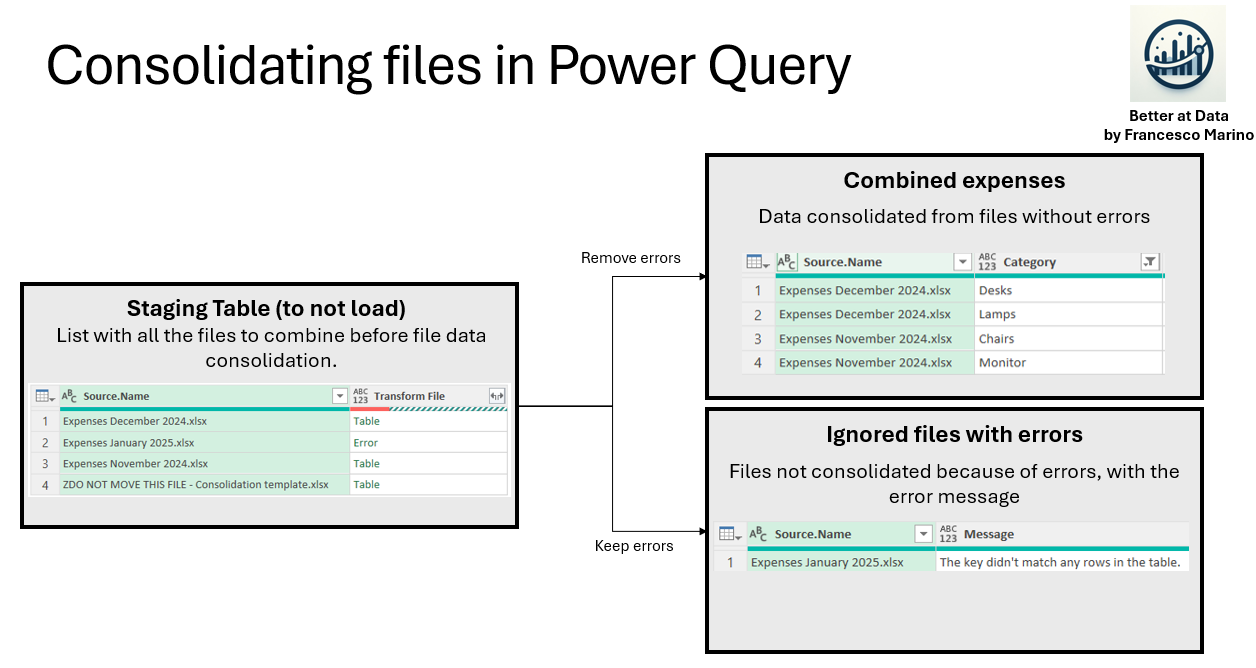
This is how I do it:
I create a staging query with the complete list of files.
Then I remove the errors and expand the table to get the expected results on the “Combined Expenses” query.
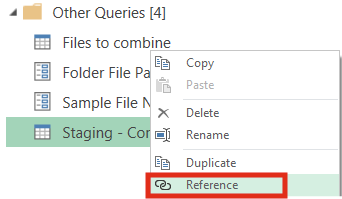
I then create another query that references the staging one and that keeps only the files with errors.
In the image below you can get the logic.
Practically, we can obtain this result following these actions in Power Query.
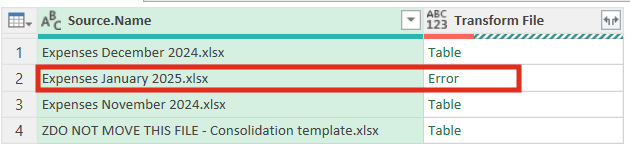
Normally, at the step prior to the “Expand Table Column”in the “Combined Expenses” query, you can see which files are problematic.
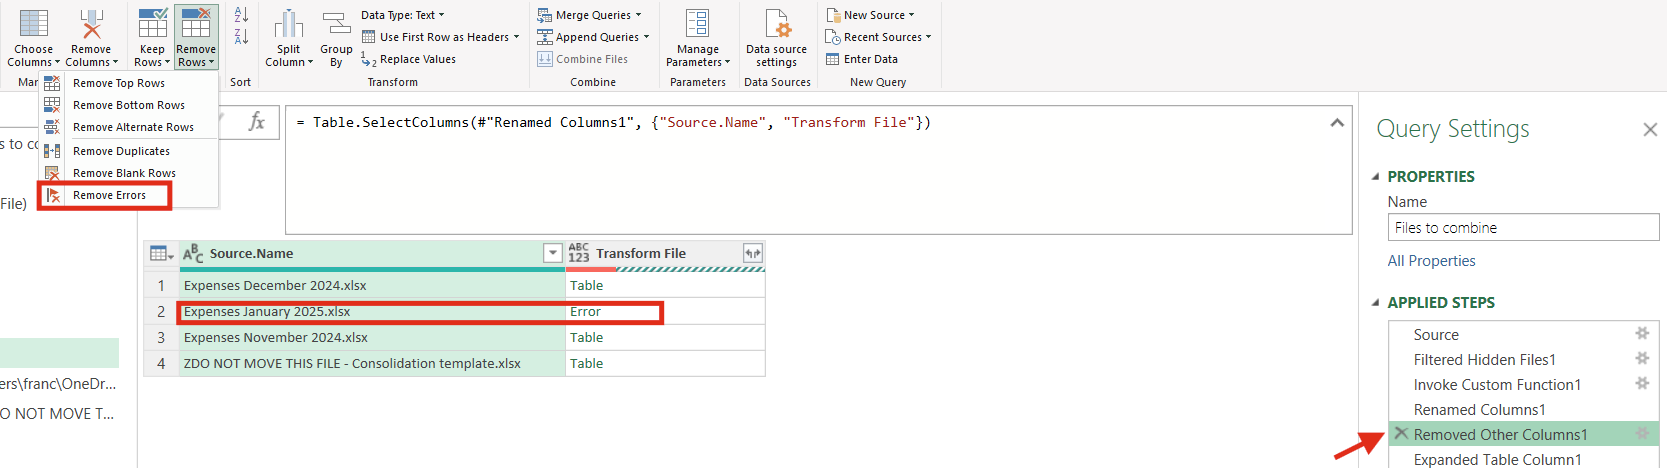
If you try to load the result of this query without removing the error in Power Query, the loading process will fail. To avoid this, you need to remove the errors in steps previous to the “Expand Table Column” in the “Combined Expenses” query. We can do it by just clicking on the “Remove Errors” button.
Now we can extract the previous steps of the query in another one with a right click on the “Removed Error” step.
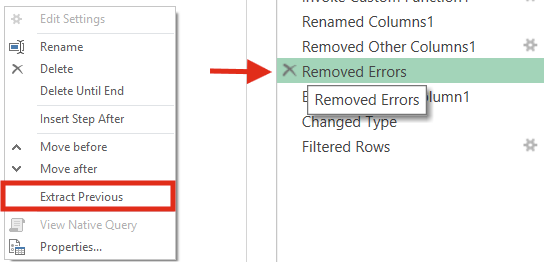
This button will create a new query that contains all the steps of the Combined Expenses up and excluding to the Removed Errors step. This new query is the Staging table. I called this query “Staging - Combined Expenses (Before error removal)”.
At this point, we have 2 out of 3 queries ready: the staging one and the combined expenses one.
Let’s create now the query with the list of files that could not be loaded because of errors. We can just simply create it by referencing the staging table, creating a new query and renaming it as “Ignored files”.
In this new query, we can now keep only the errors.
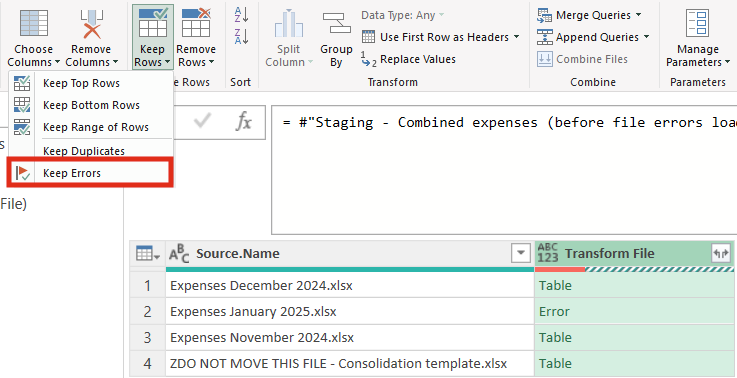
After doing this, we only need to get more information about which files are not loaded and why.
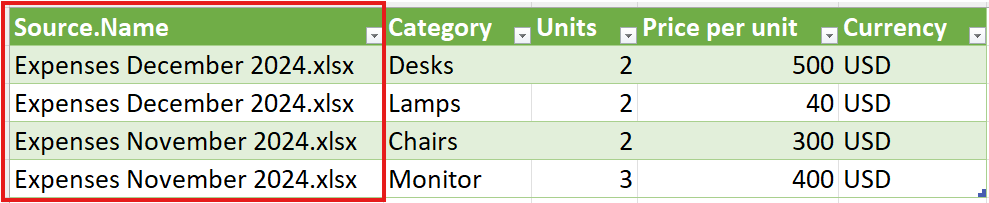
We can understand which files are not loaded directly from the “Source.Name” column.
We can understand why the loading for these files fails by creating a custom column with the “try” function. Then we need to expand this column until we get to the Error.Message column that explains what the error message is. This the final results:
one column with which files are not loaded
one column that explains why each file was not loaded.

Here the entire code of the query. So you can try yourself.
let

Source = #"Staging - Combined expenses (before file errors loading)",
#"Kept Errors" = Table.SelectRowsWithErrors(Source, {"Transform File"}),
#"Added Custom" = Table.AddColumn(#"Kept Errors", "Try Error", each try([Transform File])),
#"Expanded Try Error" = Table.ExpandRecordColumn(#"Added Custom", "Try Error", {"Error"}, {"Error"}),
#"Expanded Error" = Table.ExpandRecordColumn(#"Expanded Try Error", "Error", {"Message"}, {"Message"}),
#"Removed Columns" = Table.RemoveColumns(#"Expanded Error",{"Transform File"})

in
#"Removed Columns"
At the end of this exercise, we have the following 3 queries. The plan is to not load in Excel or Power BI the staging table since it was used only as a temporary table for the other 2.

Summary
Today we saw 3 best practices to use when you want to combine files with Power Query:
Create and use a customised file template to avoid breaking the refresh when using new files and to take into consideration columns that are not available in the single files.
Parametrise the folder path and sample file name to reuse the Power Query logic without changing the code.
Get info about which files are not combined and why so that you are sure you consolidated all the files.
You can try to do the same exercise. Solution is here: 9 - Combine files in Power Query - A few suggestions
That’s all for today,
Francesco
Do you want to give feedback about Better at Data? 📝Do it here